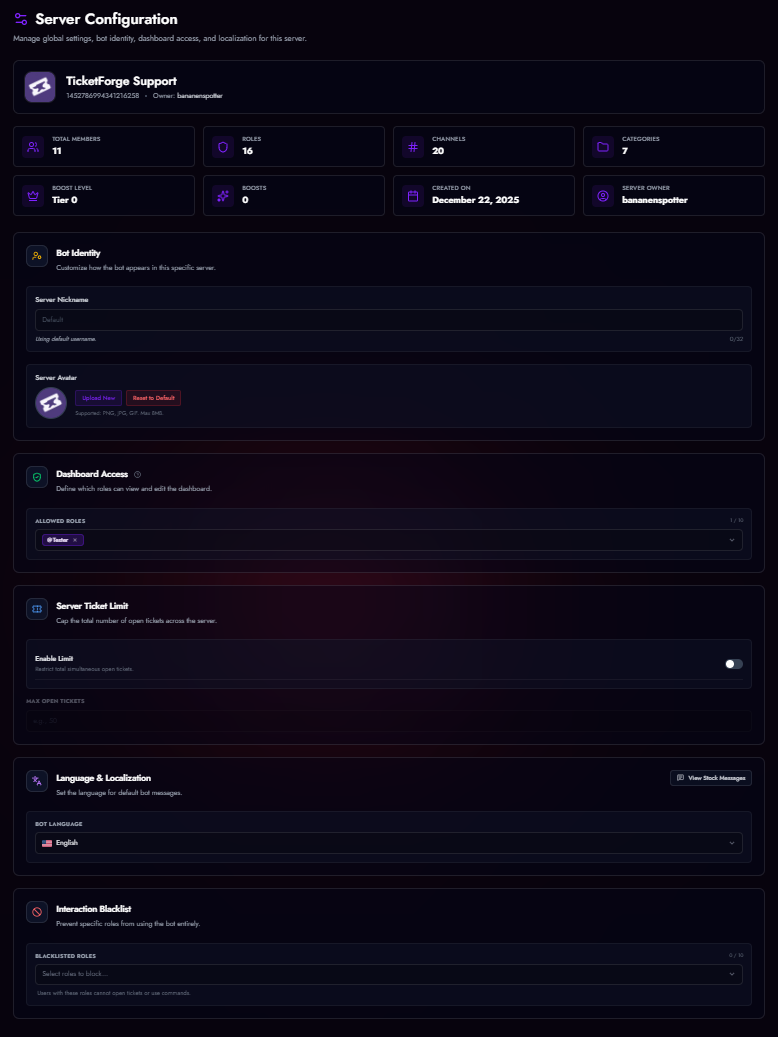
Server Configuration
Manage global settings that apply to the entire bot within your server.
Bot Persona
The Bot Persona section lets you customize how TicketForge appears in your server. There are two modes depending on your subscription plan.
Standard Identity
Premium Feature
Included with the Premium Plan. Customize the bot's appearance within your server without replacing the bot application itself.
- Nickname: Set a custom display name for the bot in your server's member list and messages.
- Avatar: Upload a custom profile picture (PNG, JPG, or GIF, max 8MB) shown only in your server.
- Banner: Upload a banner image displayed on the bot's profile card.
- Bio: Set a custom "About Me" text visible when users click the bot's profile.
Leaving any of these fields blank reverts the bot to its global defaults.
Custom Bot (Whitelabel)
Support Plan Exclusive
Support Plan Required
Running a full Custom Bot instance requires an active Support Plan subscription. It is not available on the Free, Trial, or Premium plans.
Take branding to the next level by running TicketForge under your own bot application. This fully replaces the "TicketForge" bot user with your own, giving you complete control over the username, avatar, and presence — the bot will appear as an entirely separate application in Discord.
-
Standard Identity (Premium)
Customizes the bot's Nickname, Avatar, Banner, and Bio inside your server. The bot tag still shows the original TicketForge application name when clicked.
-
Full Custom Bot (Support Plan only)
Runs a dedicated instance using your own Bot Token. Completely replaces the bot identity — your own application name, profile picture, and presence. Requires an active Support Plan.
Configuration
- Create a new application in the Discord Developer Portal.
- Enable all Privileged Gateway Intents under the Bot tab.
- Copy your Bot Token and paste it into the Server Config > Custom Bot section.
- TicketForge will spin up a dedicated instance for your server.
Google Drive Integration
Premium Feature
Securely backup your transcripts to the cloud. By connecting your Google Drive, TicketForge will automatically upload HTML transcripts to a folder in your personal Drive whenever a ticket is saved.
- Go to Server Config > Google Drive Transcripts.
- Click Connect Drive.
-
Authorize TicketForge to access your Drive files.
-
Email: Displays the connected Google account email.
- Security: We use an encrypted Refresh Token system. We do not store your password.
Dashboard Access
Control who can log in to the web dashboard to manage settings.
- Administrator: Has full access by default.
- Custom Roles: Select specific roles (e.g., "Head Mod") to grant them editor access.
- Note: Dashboard users can see all tickets and settings but cannot manage billing.
Server Ticket Limit
Cap the total number of open tickets allowed across the entire server simultaneously.
- Enable Limit: Toggles the restriction on or off.
- Max Open Tickets: Set the numeric maximum (e.g., 50). Once this limit is reached, users attempting to open new tickets will receive an error message until a current ticket is closed.
Language & Localization
Set the default language for bot system messages.
- Bot Language: Select your preferred language from the dropdown (e.g., English, Deutsch, Français, Español, Nederlands). This affects error messages and system prompts sent by the bot.
Interaction Blacklist
Prevent abuse by blocking specific roles from interacting with the bot entirely.
- Effect: Users with a blacklisted role cannot click buttons, use dropdowns, or run slash commands.
- Usage: Useful for "Muted" roles or punishing users who spam tickets.