Interaction Styles
TicketForge supports three distinct ways for users to interact with your panel. You can change this setting in the Panel Interaction Style section of the Panel Editor.
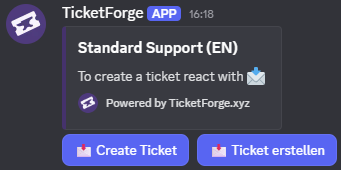
1. Standard Button
The default style. Displays simple buttons (e.g., "Create Ticket") attached to the message.

- Best for: Simple support systems with 1-3 categories.
- Configuration: Go to the Button Configuration tab to change the label, color (Primary, Secondary, Success, Danger), and emoji.
2. Select Menu (Dropdown)
Replaces buttons with a dropdown menu. This is ideal for saving space when you have many ticket categories.
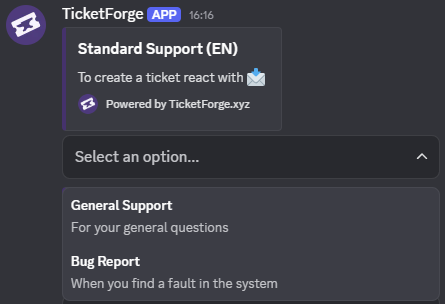
- Best for: Help desks with many departments (Billing, Tech Support, Report, General).
- Logic: Each option in the dropdown acts as a "Trigger" that links to another specific panel's logic.
How it works
- Create a "Master Panel". Set style to Select Menu.
- Create a "Billing Panel" (configure its roles and messages).
- In the Master Panel, add a dropdown option labeled "Billing Questions" and select the "Billing Panel" as the target.
When a user selects "Billing Questions", the bot executes the configuration found in the "Billing Panel".
3. Multi-Panel Buttons
Combines buttons from multiple different panels into a single message block.
- Best for: Grouping distinct ticket types (e.g., "Apply for Staff" and "Get Support") into one clean embed message.
- Configuration:
- Set style to Multi-Panel.
- Select the Attached Panels from the dropdown list.
- The buttons from those attached panels will appear together under this panel's message.